Homemade Apple Pie Filling: Your Short-Cut to Cozy Fall Delights!
Are you ready to dive into the world of Homemade Apple Pie Filling? This isn’t just any filling; it’s the magic ingredient that transforms regular pies into warm, nostalgic memories. With fall knocking on our doors and eve’s chill giving us the perfect excuse for baking, this recipe is as welcoming as your grandma’s hug. We all need a bit more warmth and sweetness in our lives, and let me tell you, nothing does it quite like a homemade apple pie!
Whether you’re preparing for a family gathering, looking to impress your friends, or simply craving that comforting aroma of apples and cinnamon wafting through your home, making your own apple pie filling is not only easy but also incredibly satisfying. So, roll up those sleeves, and let’s create something that will have your loved ones begging for second helpings!
Why You’ll Love This Homemade Apple Pie Filling
- Quick and Easy: We all have those busy days, but this recipe is so simple that it won’t become a project that eats up half your Saturday.
- Customizable: You can tweak the sweetness or spice according to your family’s taste, which means no more picky eaters at the table.
- Memorable Flavor: Seriously, what’s not to love about the heavenly combination of fresh apples, sugar, and cinnamon? Each bite is like a warm hug!
Ingredients
Let’s gather our supplies! Here’s what you’ll need:
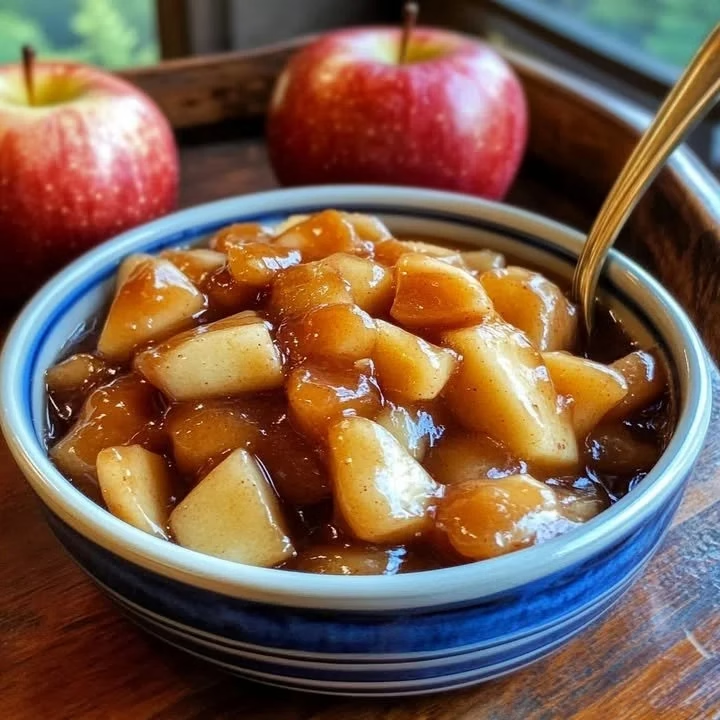
- 6-8 cups of peeled, cored, and sliced apples (Granny Smith or Honeycrisp are fabulous choices!)
- 1 cup of granulated sugar
- 2 tablespoons of brown sugar (for that caramel-like depth)
- 1 teaspoon of cinnamon (because we can’t get enough of that spice!)
- ¼ teaspoon of nutmeg (optional, but oh so delightful!)
- 2 tablespoons of lemon juice (to keep those apples bright and fresh)
- 2 tablespoons of cornstarch (to thicken things up)
Steps to Perfect Your Filling
Prep Those Apples: Start by peeling, coring, and slicing your apples. Grab your favorite knife (the one that makes you feel like a pro) and get to work! Don’t fret if the slices aren’t perfect; rustic is the new chic!
Mix and Mingle: In a large bowl, toss those lovely sliced apples with the granulated sugar, brown sugar, cinnamon, nutmeg, lemon juice, and cornstarch. Use your hands to mix them up—yes, get in there! It’s almost like a mini workout, and they say cooking burns calories, right?
Let It Rest: Allow your mixture to sit for about 15-20 minutes. This gives the apples a chance to mingle with the sugars and spices, resulting in a syrupy goodness that makes this pie filling divine.
Cook It Up: If you’d like a thicker filling, cook this mixture in a saucepan over medium heat just until the apples are tender. This approximately takes 5-10 minutes. Don’t forget to stir occasionally—you want everything to blend beautifully!
Cool Down: Once your filling has reached that gooey stage of perfection, allow it to cool completely. You can use it immediately or refrigerate it for up to a week. Filling your pie crust with this mixture will make you feel like a superstar!
Cooking Tips
- Choose Your Apples Wisely: A mix of tart and sweet apples will give your filling the best flavor and texture.
- Make It Ahead: Prepare the filling a day in advance and store it in the fridge. It’ll save you time on pie day and, let’s face it, everyone loves a good shortcut!
- No Peeler? No Worries!: Saving time is a priority! If you’re desperate for apple pie filling but don’t have a peeler, consider using pre-sliced apples; just keep an eye on freshness.
A Slice of Nostalgia
You know, this apple pie filling has a special place in my heart. Every Thanksgiving, my sister Patricia and I would gather in the kitchen with our grandma, each of us taking turns to mix and taste. It became our tradition to compete over who could create the perfect blend of spices. Spoiler alert: Grandma always won! Now, cooking this filling takes me back to those cozy moments, which is why I enjoy sharing it with you.
FAQs
Can I substitute a different fruit for this recipe?
Absolutely! This recipe is just as delicious with pears or berries. Feel free to experiment!
How can I store leftovers?
Store your homemade filling in an airtight container in the fridge for up to a week, or freeze it for up to 3 months.
Can I make this filling without sugar?
Yes! You can use sugar substitutes like stevia or monk fruit for a low-sugar option. Just keep in mind to adjust quantities per the substitute’s guidelines for sweetness.
As we savor this Homemade Apple Pie Filling, take a moment to appreciate not just the flavors but the memories we create in our kitchens. Whether you’re sharing a slice with family or enjoying a moment of peace by yourself, this filling will help you nurture both.
By the way, if you loved this recipe, you might want to check out my Classic Apple Pie Recipe for how to make the final bake come together perfectly!
So, grab those apples and let’s whip up some cherished memories together. You’ve got this!
Meta Description: Homemade Apple Pie Filling is the perfect recipe for cozy evenings. Quick, easy, and delicious, this filling will become your go-to treat!
Homemade Apple Pie Filling
Ingredients
Method
- Start by peeling, coring, and slicing your apples.
- In a large bowl, toss sliced apples with granulated sugar, brown sugar, cinnamon, nutmeg, lemon juice, and cornstarch.
- Allow the mixture to sit for about 15-20 minutes.
- If you prefer a thicker filling, cook the mixture in a saucepan over medium heat until the apples are tender, stirring occasionally.
- Once the filling is ready, allow it to cool completely before using.