Coffee Ice Cream Cake: The Ultimate Sweet Indulgence for Busy Lives
What’s better than dessert? Dessert that requires barely any effort! If you’re anything like me, a delightful slice of Coffee Ice Cream Cake sounds like the perfect treat to cap off a long day. Whether you’re looking to impress guests or just treat yourself after a hectic week, this recipe is a game-changer. Yes, we know, life gets busy, but dessert should always be a priority!
Why You’ll Love This Coffee Ice Cream Cake
This delectable cake combines rich coffee flavor with the creaminess of ice cream in a way that’s not only stress-free but also absolutely delicious. Plus, it doesn’t require baking! You heard that right—no oven involved, so your kitchen won’t turn into a sauna. It’s perfect for those warm summer nights when you want to enjoy something sweet without breaking a sweat. Trust me, your taste buds will thank you!
Ingredients
Here’s what you’ll need to whip up this delightful treat:
- 1 cup brewed coffee (or espresso)
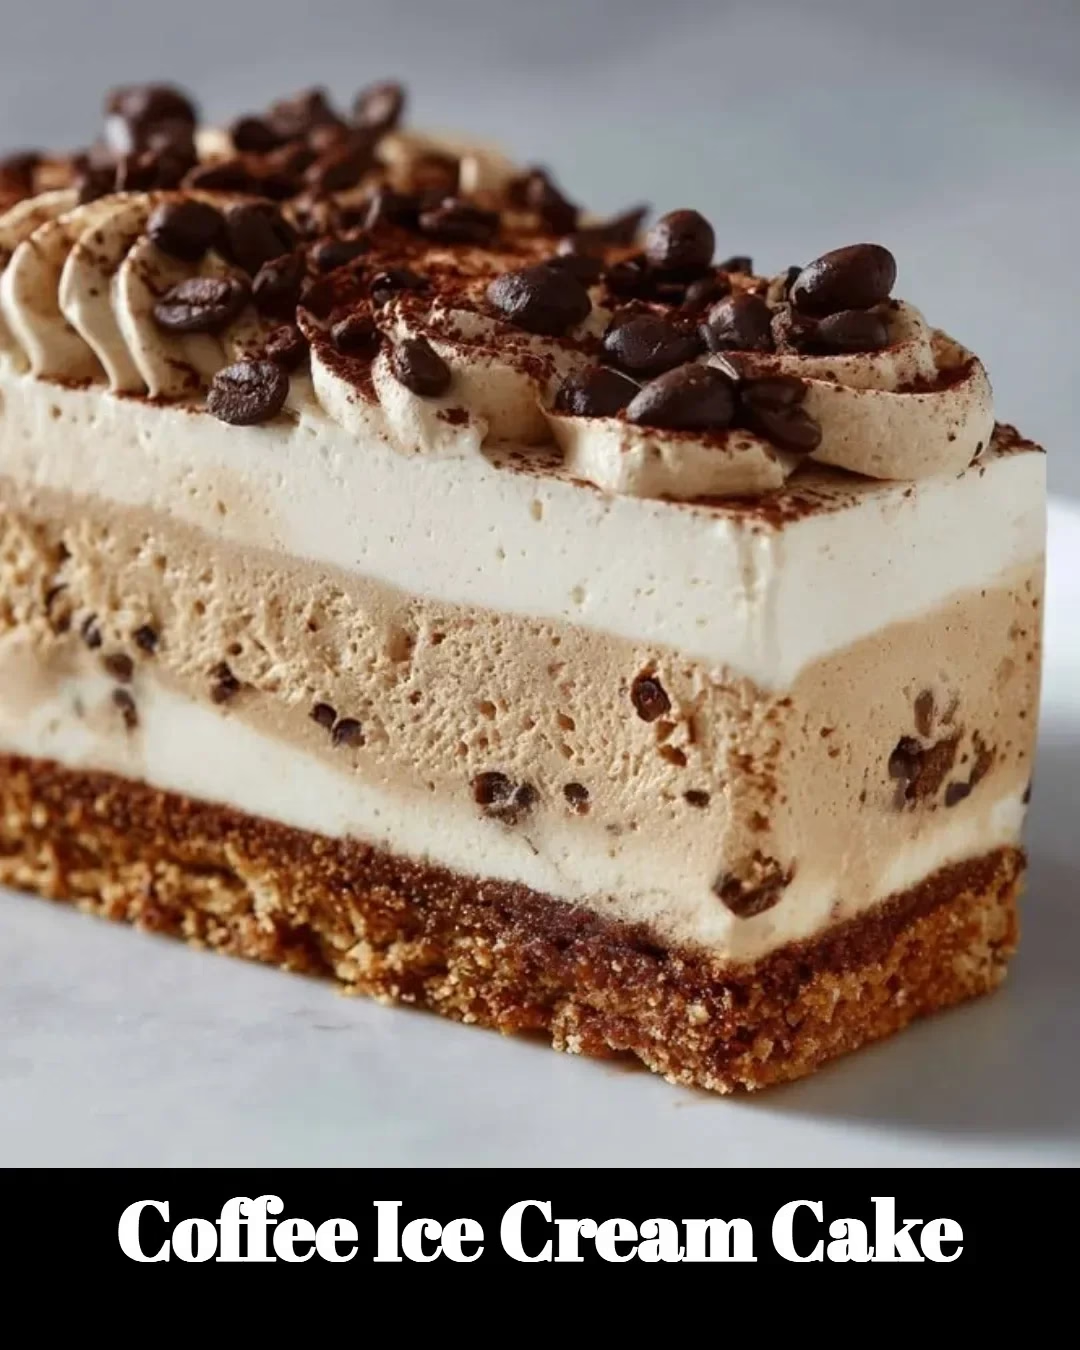
- 1 pint of coffee ice cream
- 1 pint of vanilla ice cream
- 1 chocolate cake (store-bought or homemade)
- Chocolate syrup (for drizzling)
- Whipped cream (for topping)
- Optional: Chocolate shavings or cocoa powder for garnish
Steps to Create Your Coffee Ice Cream Cake
Follow these easy steps, and you’ll have a show-stopping dessert in no time!
Step 1: Brew the Coffee
Start by brewing some strong coffee or espresso. You want it to be flavorful and bold, so skip the decaf for this one—it’s a dessert, not bedtime!
Step 2: Prepare the Cake Base
If you’ve opted for a homemade cake (kudos to you!), make sure it’s completely cooled. Place your chocolate cake on a serving platter. If you chose the store-bought route—don’t worry—there’s no judgment here! Just set it down and move to the next step.
Step 3: Add Coffee Ice Cream
Once your cake is ready, scoop the coffee ice cream directly onto the cake. This is where things start to get deliciously messy, and it’s all part of the fun! Spread it evenly over the surface, but don’t stress over perfection—remember, homemade is just that: homemade!
Step 4: Add Vanilla Ice Cream
Next up, do the same with the vanilla ice cream. You might want to let it sit for a few minutes to soften up so it spreads easily. After all, no one wants to wrestle with a rock-hard ice cream block!
Step 5: Chill
Cover your creation with plastic wrap and place it in the freezer for about 2-3 hours to firm it up. This is the perfect time to binge-watch your favorite show or catch up on some reading!
Step 6: Top It Off
Before serving, remove the cake from the freezer. Drizzle some chocolate syrup on top and finish with a generous dollop of whipped cream. Go ahead, channel your inner pastry chef—don’t be shy with toppings. If you’re feeling fancy, sprinkle some chocolate shavings or dust with cocoa powder.
Step 7: Slice and Serve
Grab a sharp knife, cut a slice, and watch the ooey-gooey ice cream magically blend with the rich cake. Now, sit back and enjoy your well-deserved reward!
Cooking Tips
- Don’t Rush the Freezing: It’s tempting to serve right away, but patience is key! Letting the cake chill properly will elevate your treat from good to extraordinary.
- Customize Your Flavors: Love chocolate? Try chocolate ice cream instead of vanilla. It’s dessert; the rules are yours to bend!
- Leftovers? No Problem! If by some miracle you have any leftovers, store them in an airtight container back in the freezer. Just be prepared for a delightful surprise when you dig back in!
Personal Anecdotes
I remember the first time I made this cake for a family gathering. My kids had friends over, and honestly, I had no idea how it would go down. But as the first slice was served, it felt like a scene in a cooking show. The smiles and oohs and aahs were priceless! This recipe quickly became our go-to for impromptu celebrations and cozy weeknights alike.
FAQs
Can I substitute coffee ice cream?
Absolutely! If you want to keep it caffeine-free, consider using caramel or mocha ice cream for that sweet indulgence.How can I store leftovers?
Ensure the cake is tightly wrapped in plastic wrap or stored in an airtight container to maintain its creaminess.Can I make this in advance?
Yes, ideally prepare it a day ahead. Just remember to allow time for it to refreeze before serving!
There you have it—a fabulous Coffee Ice Cream Cake that brings a touch of culinary delight into everyday life without any fuss. Trust me, once you give this recipe a go, it’ll be the dessert you crave on busy evenings and special occasions alike. So grab your apron and start creating those sweet memories!
Happy baking (or should I say, freezing)!
Meta Description
Coffee Ice Cream Cake is the perfect recipe for busy lives. Quick, easy, and delicious, this treat will become your go-to dessert. Try it today!
Coffee Ice Cream Cake
Ingredients
Method
- Brew some strong coffee or espresso.
- Place your chocolate cake on a serving platter.
- Scoop the coffee ice cream directly onto the cake and spread it evenly.
- Add vanilla ice cream on top of the coffee ice cream.
- Cover the cake with plastic wrap and place it in the freezer for about 2-3 hours.
- Before serving, drizzle chocolate syrup on top and add whipped cream.
- Add optional chocolate shavings or cocoa powder for garnish.
- Cut slices and serve.