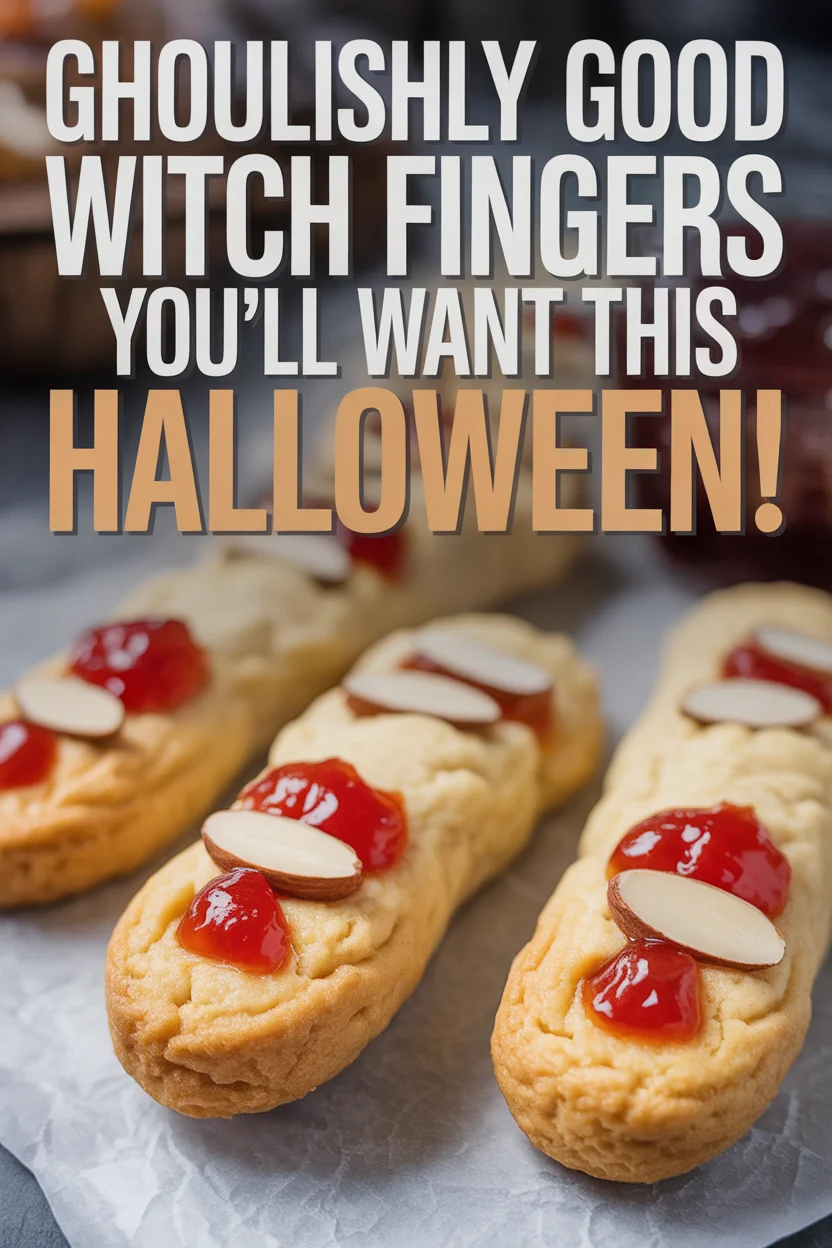
- How to Make Witch Finger Cookies
- Recipe Tips
- What do these cookies taste like?
- Gluten-free option
- Can I make these in advance?
- Serving Suggestions
- Common Questions
- Wrap Up Your Halloween With Something Spooky
Witch Fingers on your mind for Halloween? Yeah, I get that. Every year, someone in my house (okay, it’s me) forgets about bringing something spooky to the work party or school bash until the last minute. Cookies that actually look like fingers though—flaky, almond-nailed, and a little gross? It’s the only treat my kids still talk about. If you’re looking for something that’s easy to make, creepy enough to impress everyone, and, honestly, kinda hilarious, you’ll want to keep reading. And hey, check out these fun ideas for how long do cookies last and Halloween party snack hacks in case you’re planning a full bash.
How to Make Witch Finger Cookies
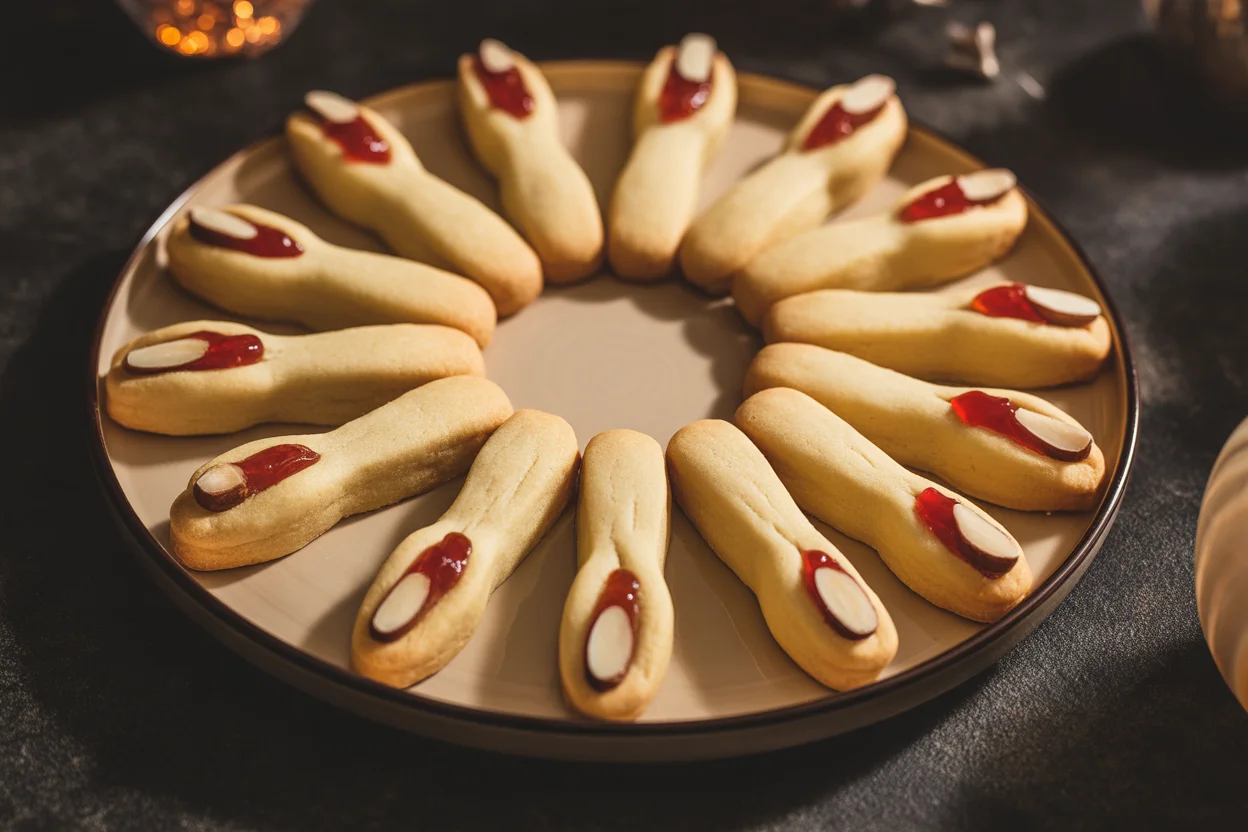
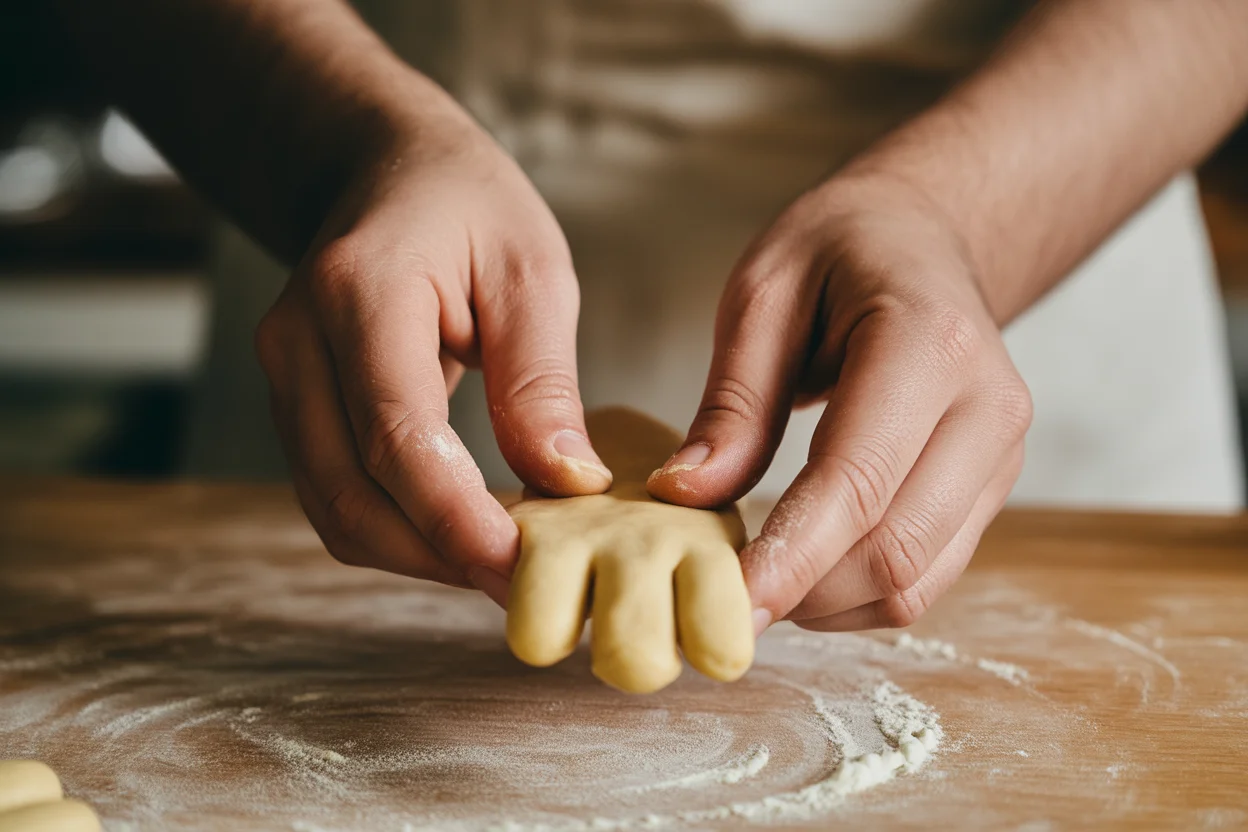
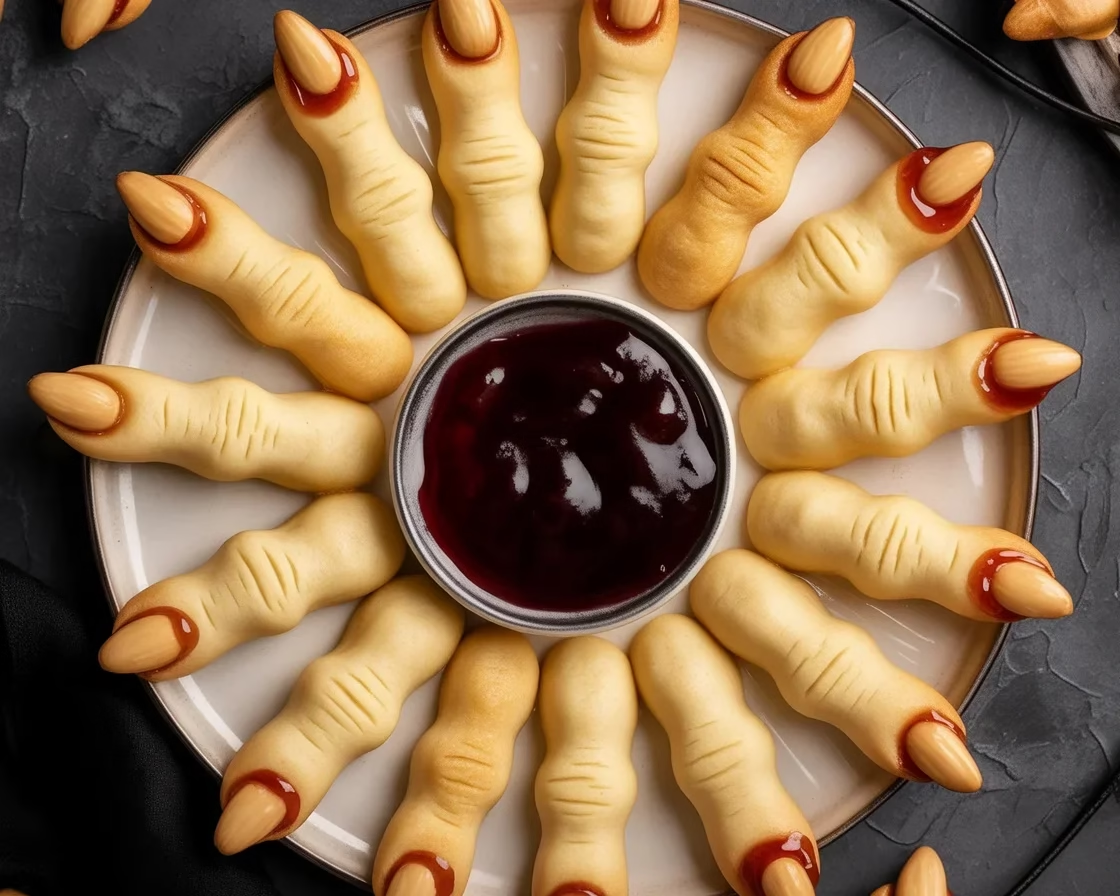
First things first, you don’t need some fancy culinary degree for these. I’m living proof. The main thing for Witch Finger cookies is a chill sugar cookie dough that you shape into, well, fingers. You roll the dough (seriously like Play-Doh, but tastier). Adding an almond at the end for the “nail” gives it just the ick look. For knuckles, I use a regular butter knife and press a couple of lines in the “finger” before baking. If you want them even spookier, brush a little red jam under the almond—it looks like the classic Halloween fake blood people go wild for.
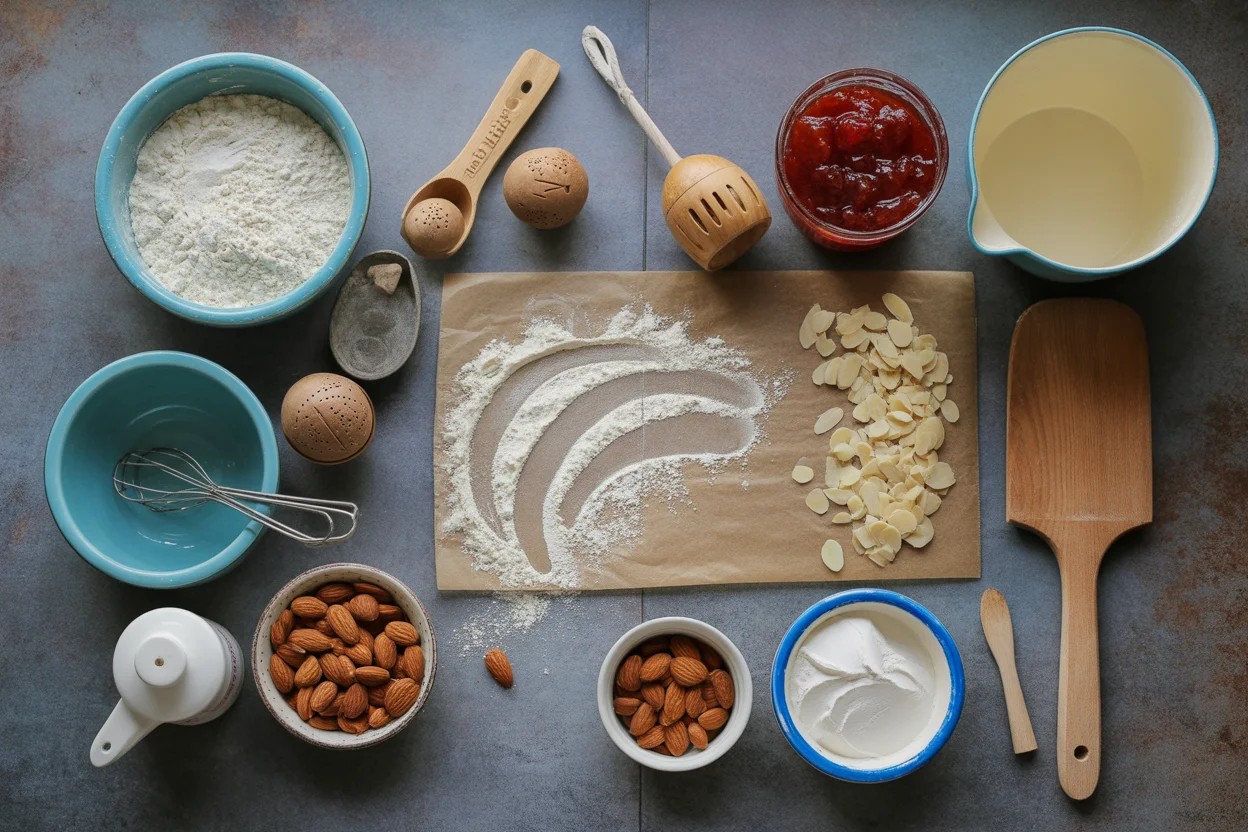
Here’s what you need: flour, softened butter (don’t use cold, it’ll make you cry), sugar, one egg, vanilla, baking powder, and, if you want the nails to pop, raw almonds. Preheat your oven so you don’t have a cold pan crisis. Shape, decorate, pop those weird little digits on a lined cookie sheet, and bake until just golden at the edges. So easy you can have kids help, or just make a mess solo, like I do every year.
Don’t stress if yours look chunky, long, or freakishly weird. That’s the point! Ugly is totally on-theme for Witch Finger cookies. I’ve never met a perfect pair of witch fingers anyway.
Recipe Tips
Here’s my truth: Witch Finger cookies taste good, but only if you don’t overbake them. So, err on the side of pale rather than brown. The dough is sticky, so chill it a bit before shaping. Trust me.
Skip food coloring if you’re not into artificial stuff—the cookies will still nail the spooky factor without neon green. But if you want fun colors, sure, mix in a drop or two. Replace almond nails with pumpkin seeds for a nut-free house. The jam is optional, but honestly, it’s what makes that first bite memorable (and gets the biggest laughs from kids). For a flavor kick, sometimes I throw in a little orange zest or a pinch of cinnamon.
Most importantly, let them cool so those almond nails don’t slide off. I’m speaking from experience after years of, well, witch-finger surgery.
I brought these Witch Finger cookies to our neighborhood potluck and not a single one came back. Some people didn’t even believe I baked them myself until I showed photos of my flour-covered kitchen table! – Josh W.
What do these cookies taste like?
Okay, you want the real scoop? Witch Finger cookies taste… buttery and lightly sweet. Think of your favorite sugar cookie but with a crackly almond at the end. The texture’s soft in the middle, way better than those grocery store sugar blobs. The bit of jam under the nail gives a tart hit—a surprise I love every October. If you add a sprinkle of spices, they lean festive, but that’s up to you. Not too sweet, which means you can eat way more than you should. Consider yourself warned.
Gluten-free option
So many people have asked if Witch Finger cookies can go gluten-free. You bet! All you need to do is swap in your favorite cup-for-cup gluten-free flour blend. I’ve used a few, and some work better than others—go for a mix that claims it’s good for cookies, not all-purpose baking, if you can.
Remember that gluten-free dough can be a little softer and stickier. Chill it a bit longer, and don’t skip the parchment paper. I suggest baking a test batch before shaping the full tray. Friends with celiac have said they actually liked the texture better gluten-free (something about the crispness). But yeah, results may vary, so don’t stress if yours look a little weird—witchy is the vibe, after all.
Can I make these in advance?
This is the best question if you’re not into baking chaos at the last minute. Witch Finger cookies are made for prepping ahead. Honestly, they’re still tasty a few days later if you keep them in a sealed tin or plastic tub. The dough also freezes like a champ—wrap it tight, then just thaw, shape, and bake.
I usually bake two days out if I’m taking them to work or sending to school. If you plan to add the jam “blood,” wait until the day before serving so it doesn’t get weird or sticky. Or, make the cookies, freeze, and decorate last minute if you want primo presentation.
Serving Suggestions
Friends always ask how to really make Witch Finger cookies part of a party. Here’s what works for me:
- Serve on a plastic Halloween tray, scattered with fake spiders.
- Drizzle with “magic” raspberry sauce for extra creepy vibes.
- Pair with hot apple cider or cocoa for a spooky snack time.
- Put a few Witch Finger cookies into party favor bags with a monster sticker.
| Tip Details | |
| Chill the Dough | To prevent sticky fingers, chill your dough for at least 30 minutes before shaping. |
| Use Real Almonds | Raw almonds give a realistic nail effect, but can be swapped for pumpkin seeds if needed. |
| Store Properly | Keep in an airtight container for up to a week, or freeze for longer storage. |
| Go Gluten-Free | Swap regular flour with a cup-for-cup gluten-free flour blend for delicious results. |
| Experiment with Flavors | Add cinnamon or orange zest for a fun flavor twist on your Witch Finger cookies. |
Common Questions
Q: Can I use food coloring in Witch Finger cookies? A: Totally! Just add it into the dough or brush it on after baking. Gel works better than liquid for bold colors.
Q: How do I keep the almond “nails” from falling off? A: Stick them on before baking, and if they still pop off, “glue” with a dab of jam or frosting after the cookies cool.
Q: What else can I use if I’m allergic to nuts? A: Pumpkin seeds or candy corn work great instead of almonds for the nails.
Q: How long do these cookies stay good? A: Up to a week in an airtight container. For longer, freeze them!
Q: Can kids help shape Witch Finger cookies? A: Yes! It’s honestly just like squishing Play-Doh (and way tastier).
Wrap Up Your Halloween With Something Spooky
So, that’s my whole (frighteningly easy) routine for Witch Finger cookies. They look wild, taste buttery, and if you want to go full mad scientist, mess around with jam, food coloring, or silly decorations. If you’re a big Halloween fan looking to try new ideas, check out some other spins like the Witch Finger Cookies (without food coloring!) – Texanerin Baking or these super-creepy tips from Creepy Witch Finger Cookies – Simply So Good and, of course, the Best Witch Finger Cookies Recipe. Have fun, get a little messy, and don’t worry if they look a bit wonky. Halloween’s all about having a blast—and a few good scares at snack time.
Creepy Halloween Treat
Description
Witch Finger Cookies are buttery, lightly sweet cookies shaped like fingers, complete with almond nails. They offer a fun and spooky treat for Halloween celebrations.
Ingredients
Instructions
- In a large bowl, cream together softened butter and sugar until smooth. Beat in egg and vanilla. Combine flour and baking powder, then gradually add to the creamed mixture. Chill the dough for at least 30 minutes.
- Preheat oven to 350°F. Roll chilled dough into finger shapes and place on lined cookie sheets. Press down gently with a butter knife to create knuckle impressions.
- Place an almond at the tip of each finger to represent nails. If desired, brush with jam for a ‘bloody’ effect. Bake for 15 minutes or until lightly golden around the edges.
Notes
- These cookies can be made gluten-free and stored in an airtight container for up to a week.