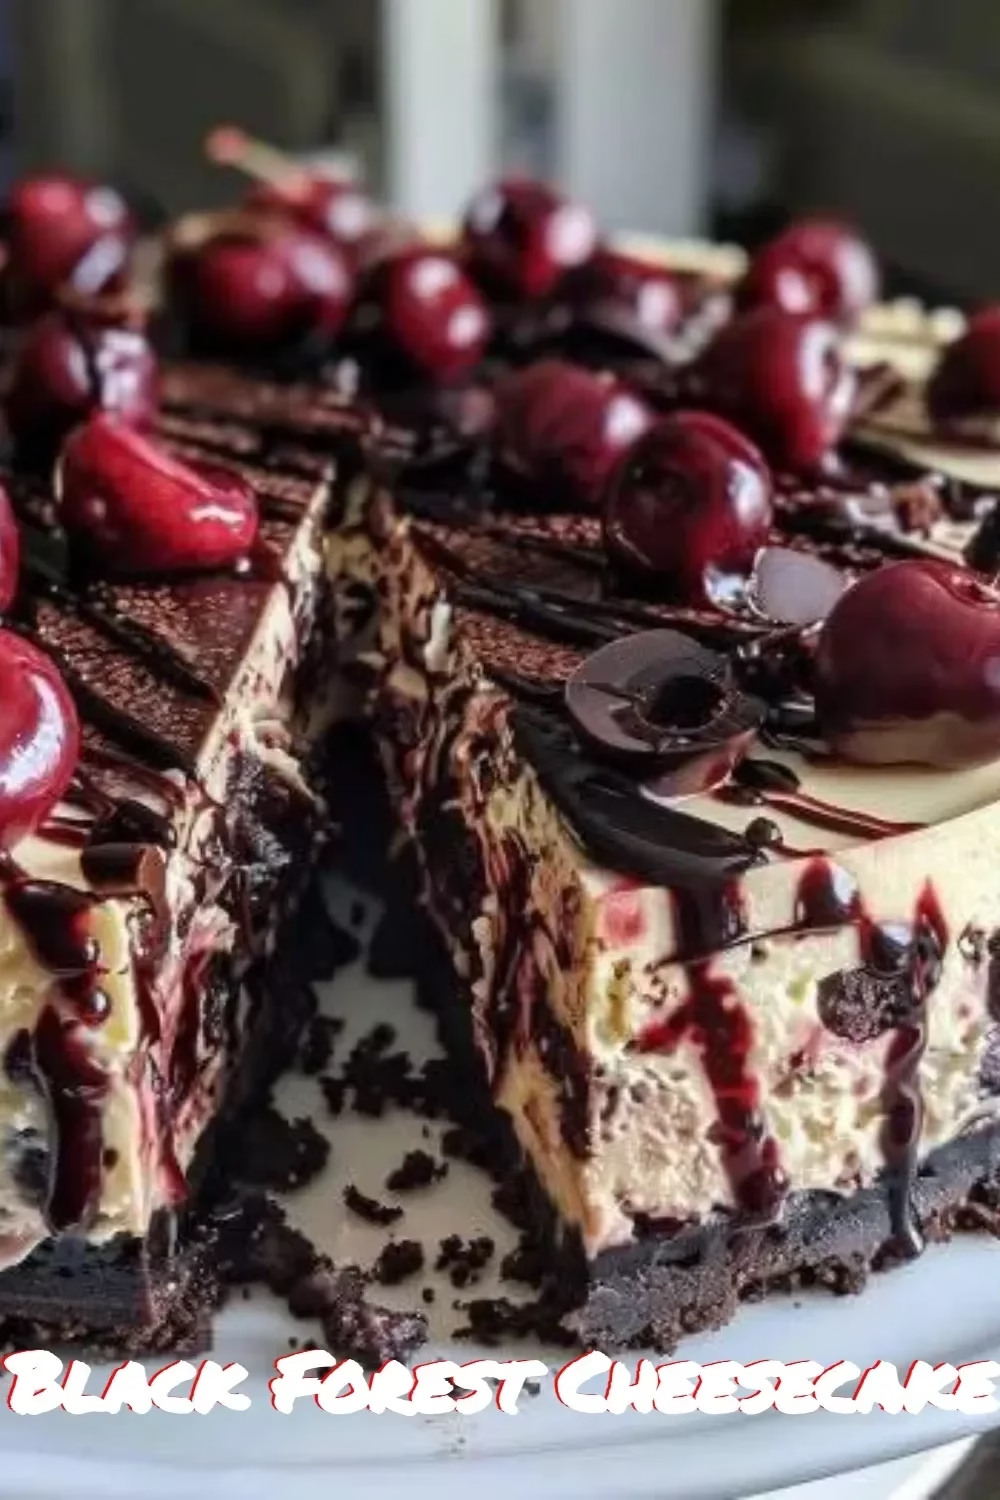
Indulge in the Decadence of Black Forest Cheesecake
Who said you can’t have your cake and eat it too? The delectable Black Forest Cheesecake is your ticket to dessert paradise! If you’re looking for a sweet treat that masterfully combines rich chocolate, creamy cheesecake, and tart cherries, then this recipe is just what you need. Perfect for impressing guests, celebrating special occasions, or simply satisfying that sweet craving (because let’s face it, we all have those days!), this cheesecake is sure to be a hit in your kitchen.
Why You’ll Love This Black Forest Cheesecake
Imagine this: a luscious layer of chocolatey goodness topped with a velvety cheesecake, all blanketed in a cherry compote and garnished with whipped cream. Sounds heavenly, right? This Black Forest Cheesecake is not just a feast for the taste buds; it’s a statement on your dessert table!
Quick Takeaways:
- Crowd-Pleaser: Great for gatherings or a casual night in.
- Rich & Creamy: The perfect blend of flavors and textures.
- Simple Steps: Even if you’re not a pro baker, I promise you can pull this off!
So, roll up your sleeves, grab your apron, and let’s dive into this delightful creation.
Ingredients You’ll Need
For the crust:
- 1 1/2 cups chocolate cookie crumbs (think Oreos)
- 1/4 cup unsalted butter, melted
For the cheesecake layer:
- 16 oz cream cheese, softened
- 1 cup sugar
- 1 tsp vanilla extract
- 3 large eggs
- 1/4 cup sour cream
For the cherry topping:
- 1 cup cherry pie filling (or fresh cherries if you’re feeling adventurous!)
- 1 cup whipped cream (store-bought or homemade, no judgment here!)
Steps to Make Your Black Forest Cheesecake
Prepare the Crust:
- Preheat your oven to 325°F (165°C). Grease a 9-inch springform pan and set aside.
- In a mixing bowl, combine the chocolate cookie crumbs with melted butter until the mixture resembles wet sand. Press this into the bottom of the prepared springform pan to form the crust. Bake for 10 minutes, then let it cool. (Hold on to that decision to sneak a taste — we won’t tell!)
Craft the Cheesecake Filling:
- In a large bowl, beat together the softened cream cheese and sugar until smooth and creamy. I mean, who doesn’t love a good cream cheese beatdown?
- Add in the vanilla extract, eggs (one at a time, please), and sour cream. Mix well until fully blended and luscious.
- Pour this cheesy goodness over the cooled crust, smoothing out the top with a spatula.
Bake It Up:
- Pop that bad boy into the oven and bake for 50-60 minutes. You’re aiming for the center to set but remain a tiny bit wobbly (a little jiggle in the middle is a good thing!).
- Turn off the oven and crack the door slightly. Let the cheesecake cool in the oven for another hour. Trust me, it’ll help prevent cracks.
Chill Out:
- Once cool, refrigerate the cheesecake for at least 4 hours, preferably overnight. The anticipation will make it all the more rewarding!
Top It Off:
- Before serving, spoon the cherry pie filling over the top, and finish it off with dollops of whipped cream. Go ahead, be generous—this is your moment!
Cooking Tips
- Make It Ahead: This cheesecake holds well in the fridge for a couple of days, making it the ultimate make-ahead dessert. Just don’t be surprised when you catch family members sneaking bites!
- Texture Matters: If your cheesecake cracks, it’s okay. Just cover it up with whipped cream and cherries. Voilà, you’ve turned a little mishap into creative decoration!
- Want to Change It Up? You can swap out the cherries for raspberries or strawberries for a fun twist on this classic favorite. Feel free to get creative — it’s your cheesecake after all!
FAQs
Can I substitute the cream cheese?
Absolutely! You can use mascarpone for a slightly different flavor, or if you’re in a pinch, ricotta can work too. Just be mindful of the texture.
How should I store leftovers?
If you’re lucky enough to have any leftovers, store your Black Forest Cheesecake in the refrigerator, covered. It should last about 3-4 days.
Can I freeze this cheesecake?
Yes! Just wrap it tightly in plastic wrap and aluminum foil, and it can be frozen for up to 2 months. When you’re ready to enjoy, thaw it in the refrigerator overnight.
Final Thoughts
Whether it’s a birthday bash or just a Tuesday night, this Black Forest Cheesecake should definitely make an appearance. It’s indulgent, satisfying, and sure to bring smiles all around the table. So, unleash your inner cake goddess and enjoy creating a dessert that’s as much about the journey as it is about the destination.
And when you take that first bite, you might just find yourself wishing you had saved a slice for breakfast. Don’t worry, we won’t judge!
Happy baking, friends! For more delightful recipes to satiate your sweet tooth, check out my Easy Chocolate Mousse and Classic Vanilla Cupcakes for inspiration.
Meta Description: Black Forest Cheesecake is the perfect recipe for satisfying sweet cravings. Quick, easy, and delicious, this dish will become your go-to dessert. Try it today!
Black Forest Cheesecake
Ingredients
Method
- Preheat your oven to 325°F (165°C). Grease a 9-inch springform pan and set aside.
- In a mixing bowl, combine the chocolate cookie crumbs with melted butter until the mixture resembles wet sand. Press this into the bottom of the prepared springform pan to form the crust.
- Bake for 10 minutes, then let it cool.
- In a large bowl, beat together the softened cream cheese and sugar until smooth and creamy.
- Add in the vanilla extract, eggs (one at a time), and sour cream. Mix well until fully blended.
- Pour this mixture over the cooled crust, smoothing out the top with a spatula.
- Pop the cheesecake into the oven and bake for 50-60 minutes until the center is set but remains slightly wobbly.
- Turn off the oven and crack the door slightly. Let the cheesecake cool in the oven for another hour.
- Once cool, refrigerate the cheesecake for at least 4 hours, preferably overnight.
- Before serving, spoon the cherry pie filling over the top, and finish it off with dollops of whipped cream.